Showing posts with label flower. Show all posts

Tuesday, November 9, 2010

Rosette Clips

I had a special order for several rosette clips.
The customer wanted specific colors to match outfits her daughters were wearing to a wedding.
I think they turned out cute.

I made two clips with all three colors on one clip.

Two rose clips with only two of the colors. This one is not as heavy and might be better for the littlest girl, she doesn't have as much hair.


I am happy. I hope she is?!


Button NO Blink

Saturday, September 4, 2010

Lamp Bouquet

This was a project that I was really looking forward to, the outcome that is. Doing it was a not super fun. But I did it, and I am done. And look how cute it is!
I started off with a lamp I got last year at Big Lots! for $7.00. The lamp was in bad shape. It had a pink boa glued to it! Who would do such a thing....me. It was a bad choice I admit. At the time it seamed like a really good idea. Then I plugged it in a realized the fire hazard. The feathers were everywhere! So I ripped it off and started fresh.
Some ideas just should not be done.

I purchased four colors of felt by the yard.

Cut them into different size squares and then into circles. You can see my tutorial here and here.
Then I started gluing them on with hot glue.
At one point I ran out of hot glue and had to use a different glue. Stressed me out! I am a hot glue girl through and through.
I am almost done!

All done! I really like the different sizes of flowers. Some a huge and some are super tiny.

So cute!

Here it is attached to the lamp base and an my daughters night stand.

She loves it! Can't keep her hands off of it!
Being that she is only three we had a talk about the bulb. I had her touch it so she would learn never to do it again...HOT! We also talked about how she can't just turn it on and off all day. I hope this was not a mistake?!
Oh well, it is cute!

Friday, August 27, 2010

Felt Flower Tutorial

In previous posts here, here and here I have used felt flowers. I did a small tutorial but I wanted to try out a video tutorial, so here it is!


Tuesday, July 27, 2010

Felt Flower Wreath

Oh My! I made this! It is so cute! (sorry but I am really excited about how this turned out!)

I made this wreath with felt flowers. You can learn to make them here.
The only supplies you need is:
  • a foam wreath
  • hot glue gun
  • LOTS of glue sticks
  • felt

You can get felt at your craft store in 9x12 pieces. They are .30 cents at Joann's. It took about 20-25 sheets of felt for my wreath but it will vary depending on what size wreath you pick and how big you make your roses.

You can buy felt by the yard also. This may be a better way to do it if you are going to do a lot of roses for a large wreath.
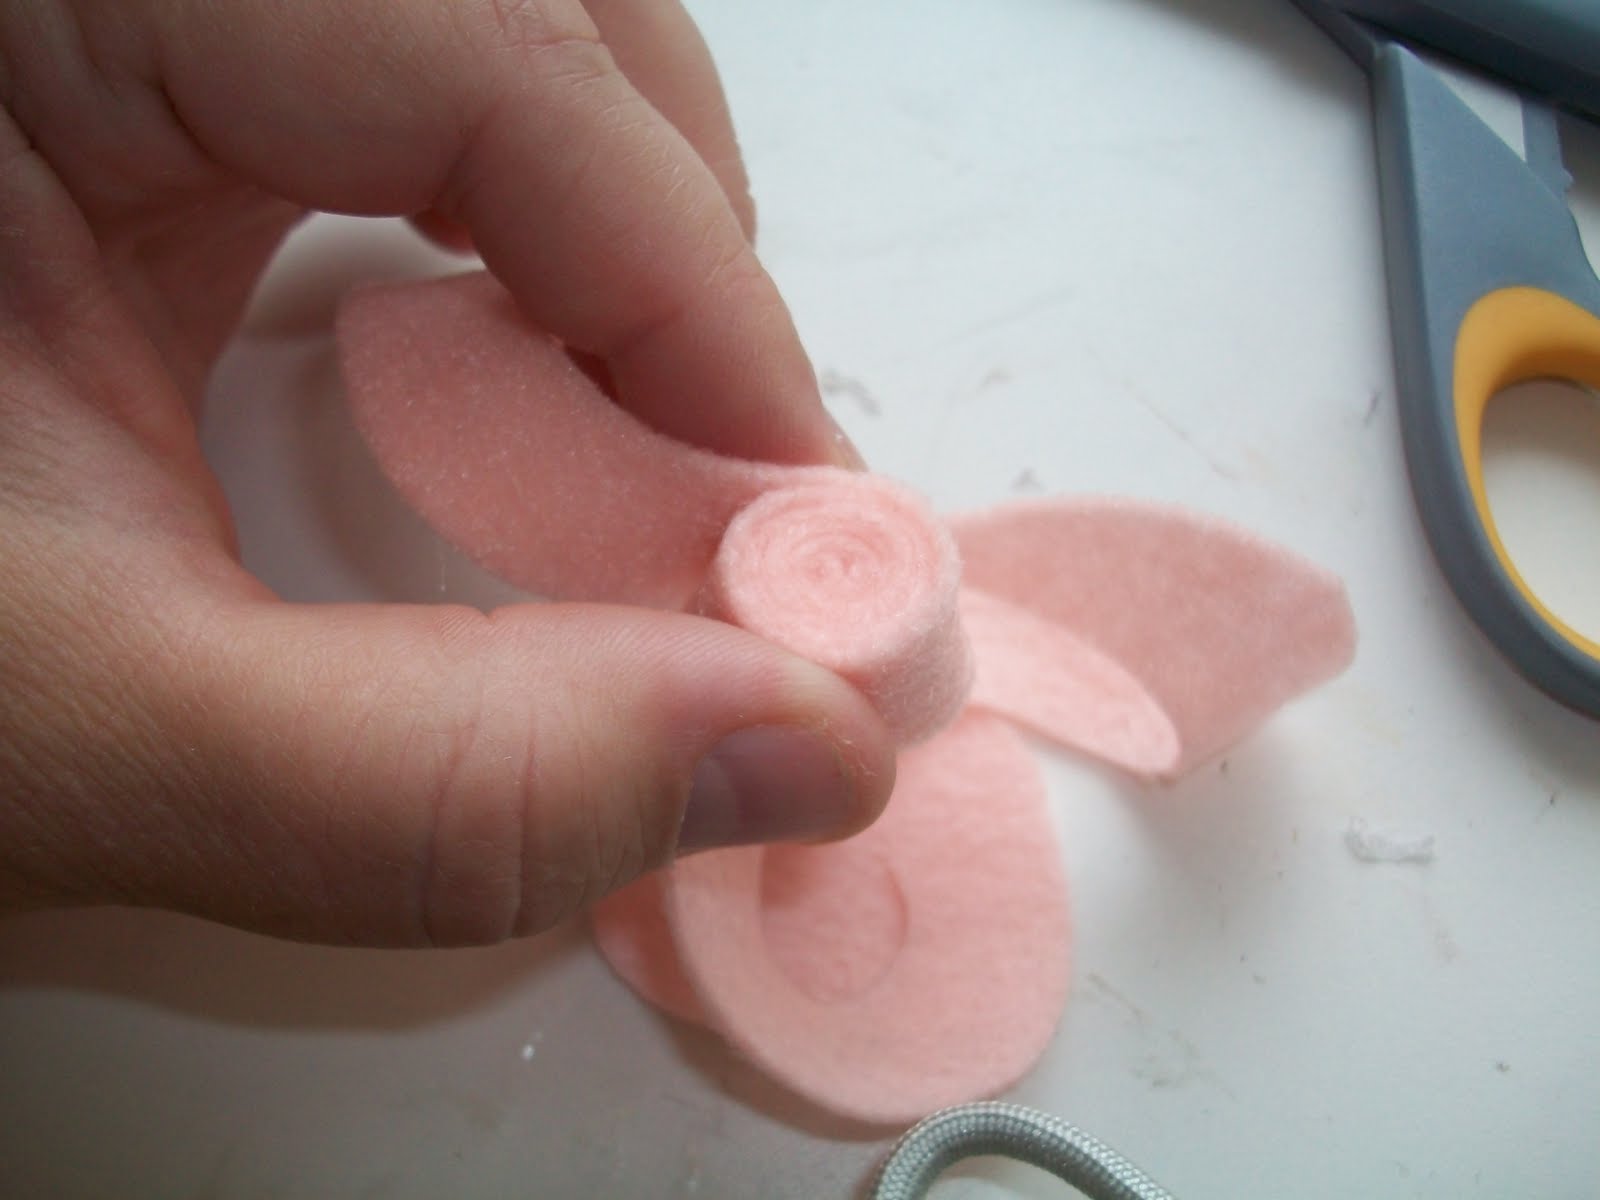
I started by making lots of roses. This is only a small amount of them.

Then you just start hot gluing them on the wreath. Keep it random and keep them close together to avoid seeing the wreath through the roses.

Keep going...

Keep going...

I didn't do the back of my wreath. Why should I? No one will see it!

At this point you need to decide how you are going to hang your wreath. I decided to hang mine from a door hanger on my daughters door. So I used coordinating ribbon and pinned in on my wreath. (see the pins?) Then I covered over the ribbon and pins with more flowers.

Here is my door hanger. Gold? yuck!

I covered it with white fabric scraps. This way if I want to use it again later somewhere else I just take the fabric off.

Ta Da! It is so cute!

It looks super cute on my daughters bedroom door. It matches the girly colors inside and makes her room extra special.


Friday, July 16, 2010

Felt Flower Tutorial

Here is my Felt Flower Tutorial.
First I started with a 8x11 sheet of felt that I got from Joann's.
They are only $.30 cents!
I cut my sheet into 6 equal squares and then rounded off the corners into a circle. That means each flower is only.05 cents!
Your circle does not have to perfect. In fact, it the lines are wavy it makes a really pretty flower.
Next I spiral cut my circle. Start narrow and get wider as you cut. This way your petal's get larger as they get further from the center of your rose.

Here is a different view of the spiral cut.
At the center of you circle leave a small circle. This will be important as we go on. This circle holds your flower together at the end.

Starting at the most narrow end, start curling it in.

Keep curling. Be sure to keep the bottom, or underside, of your rose flat. Only the top side of your rose should have layers. Does that make sense? See the pictures to see what I mean.

Keep curling. Make sure your bottom is flat. You can add a drop of hot glue every so many rounds. This helps if you accidentally drop your rose. That has never happened to me though... LOL!

You are at the end! Now you should have the circle of felt left. Hot glue all over the flat bottom of your rose and press the circle onto it. This will hold all your layers together. If you circle is bigger than your rose bottom just trim off the excess.

You are done!

Here are a few I have made. I added a rhinestone to the center of one. The large pink flower is cut more wavy to add a bit more dimension. This is a little harder to curl but worth the hassle. If you want a bigger rose just start with a bigger circle.

Hope you enjoy. I love these little things. The possibilities are endless!


Flower Necklace

This is my new favorite thing!
FLOWERS!
This is a neclace bib made from felt. It was so easy and will be perfect with my church outfits. (I always wear black)
I saw a tutorial somewhere and I decided to try it out. It is really easy and CHEAP!
I used two 8x11 pieces of felt. They were $.30 per sheet at Joanns. The necklace was $1.99 and the only other thing I used was hot glue.

I will be posting a tutorial later. Hope you like?!